📖 Lead Management User Guide
Complete guide for sales teams using the Lead Management extension
Table of Contents
- Getting Started
- Creating Leads
- Working with Leads
- Lead Scoring
- Lead Assignment
- Team Collaboration
- Converting to Opportunities
- Kanban Pipeline View
- Analytics & Reporting
- Tips & Best Practices
Getting Started
Accessing Lead Management
- Open Business Central
- Search for SEW Leads in the search bar (Alt+Q)
- Click on SEW Lead List to view all leads
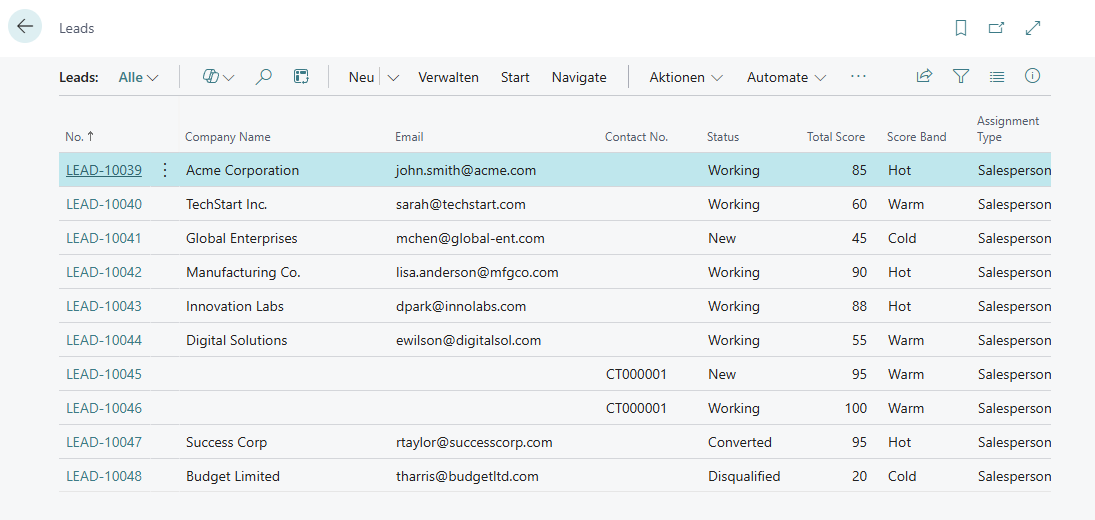
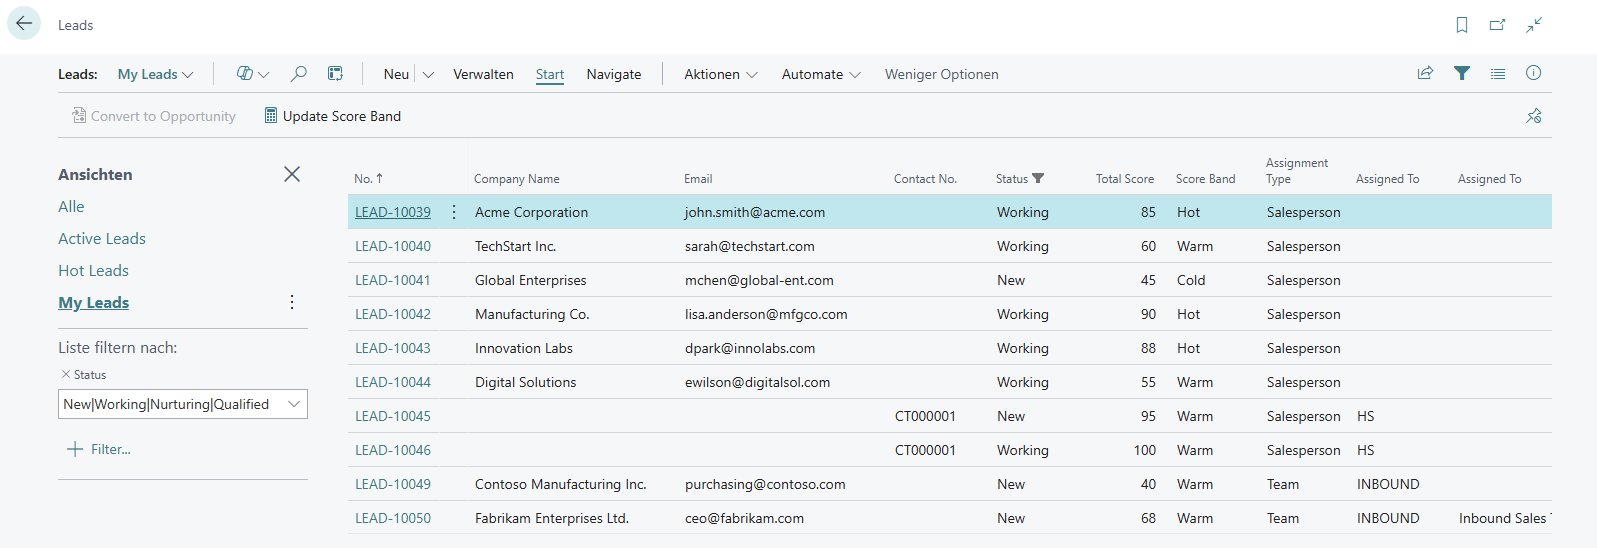
Understanding the Interface
Lead List Columns:
- No.: Lead number (auto-generated)
- Company Name: Prospect’s company
- Contact No.: Linked BC Contact
- Source Code: Where the lead came from
- Status: Current stage (New, Contacted, Qualified, etc.)
- Score: Calculated priority score
- Score Band: Visual priority (Hot 🔥, Warm 🌡️, Cold ❄️)
- Assigned To: Salesperson or team owner
- Expected Revenue: Potential deal value
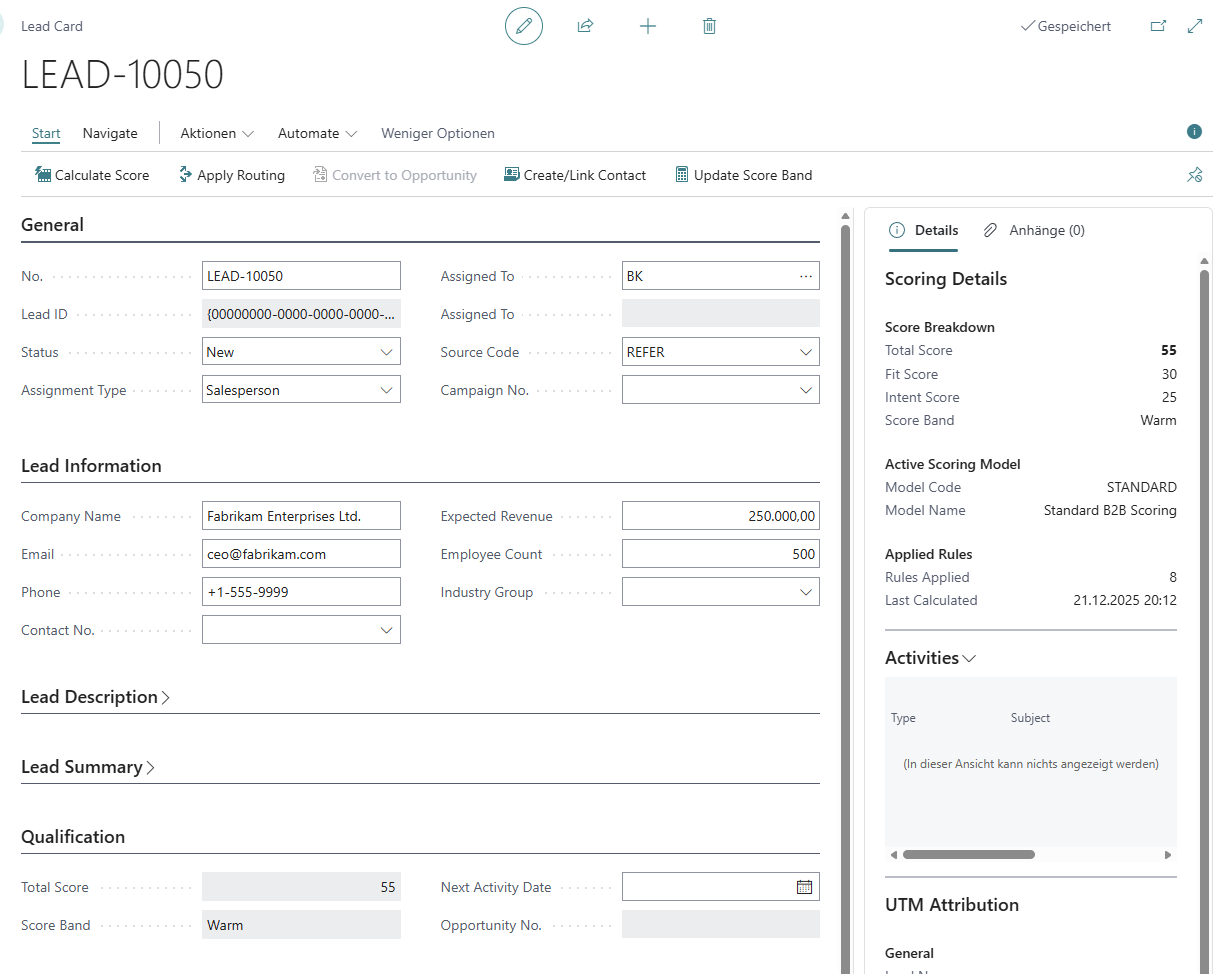
FactBox Panel (Right Side):
- Scoring Details: Shows which rules contributed to the score
- Contact Information: Quick view of contact details
- Activities: Related tasks and meetings
Creating Leads
Quick Capture Method (Fastest)
When to use: Fast lead entry from phone calls, events, quick notes
Steps:
- Click + New on the Lead List
- Fill in minimum required fields:
- Quick Company Name: “Contoso Manufacturing Inc.”
- Quick Email: “purchasing@contoso.com”
- Source Code: Select from lookup (e.g., WEB, PHONE, EVENT)
- Optional: Add Quick Phone and Expected Revenue
- Save (Ctrl+S or click OK)
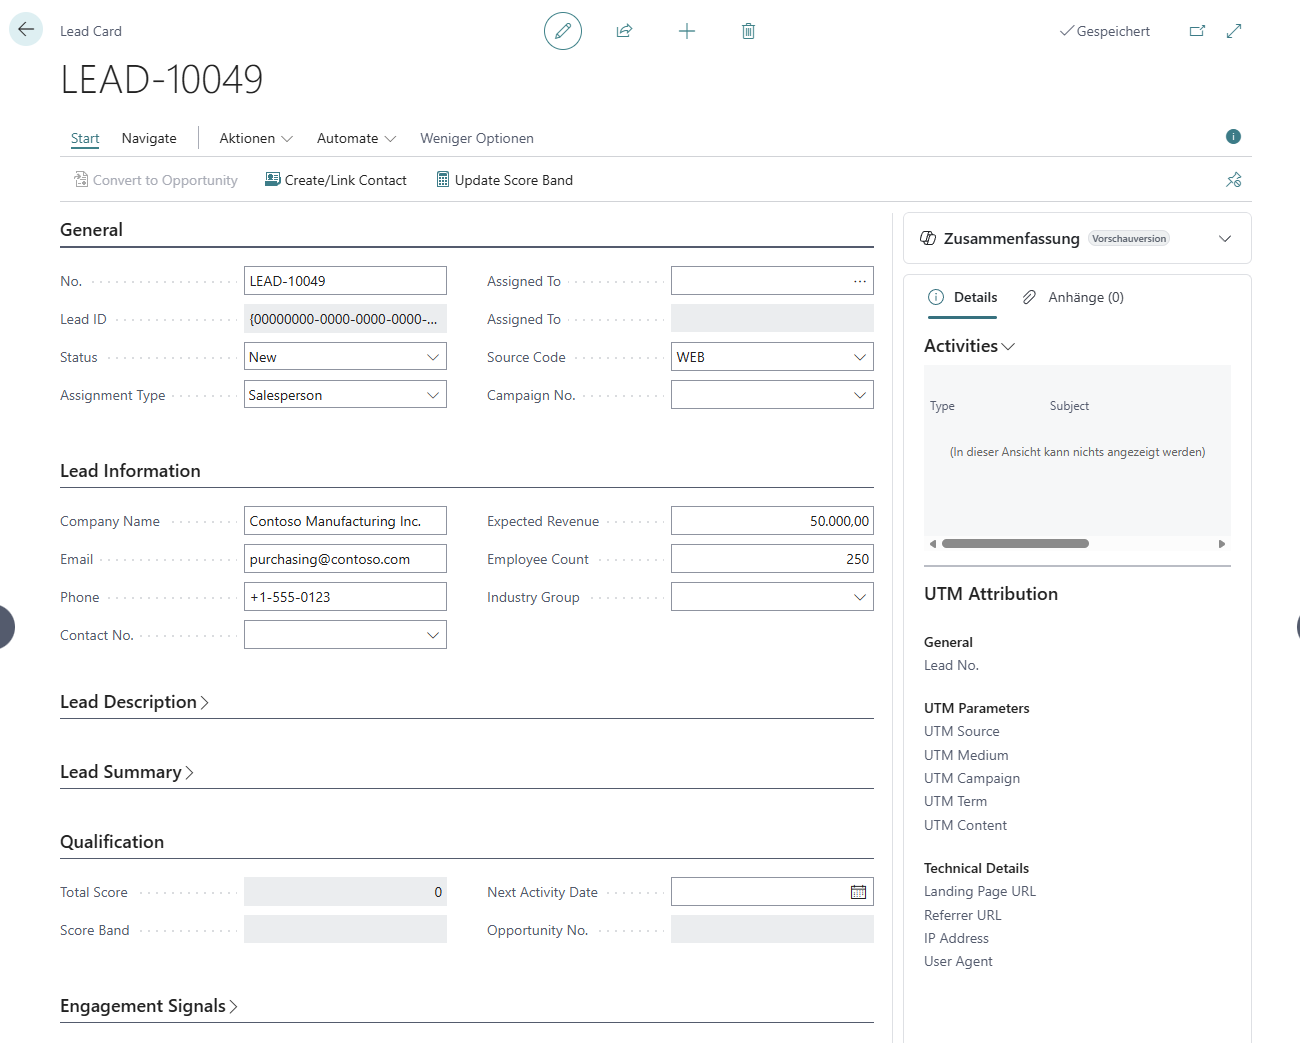
What happens:
- Lead No. is auto-generated
- Status is set to “New”
- Lead appears in your lead list
- Quick fields are temporary (cleared when Contact is created)
Full Capture Method (Detailed)
When to use: When you have complete information upfront
Steps:
- Click + New on the Lead List
- Skip Quick fields, go directly to Contact No. field
- Use lookup to find existing Contact OR click Create Contact to make a new one
- Fill in additional details:
- Source Code: Where lead originated
- Campaign No.: If from a marketing campaign
- Expected Revenue: Deal size estimate
- Employee Count: Company size (used in scoring)
- Territory Code: Geographic region
- Save the lead
Benefits:
- Immediate Contact integration
- More data for accurate scoring
- Better deduplication (BC Contact duplicate detection)
Working with Leads
Status Workflow
Leads progress through defined statuses:
Status Meanings:
| Status | When to Use | Next Action |
|---|---|---|
| New | Just received, not reviewed | Review and categorize |
| Contacted | Made first contact | Continue qualification |
| Nurturing | Not ready to buy yet | Schedule follow-up |
| Qualified | Ready for opportunity | Convert to Opportunity |
| Converted | Became an opportunity | Work the opportunity |
| Disqualified | Not a fit | Archive, no further action |
Creating/Linking Contacts
Required before converting to Opportunity
From Quick Capture Lead:
- Open the lead
- Click Actions → Create/Link Contact
- System creates BC Contact from Quick fields
- Quick fields are cleared
- Contact No. is populated
What it does:
- Creates Contact with Name, Email, Phone
- Links Contact to Lead
- Enables BC duplicate detection
- Allows conversion to Opportunity (requires Contact)
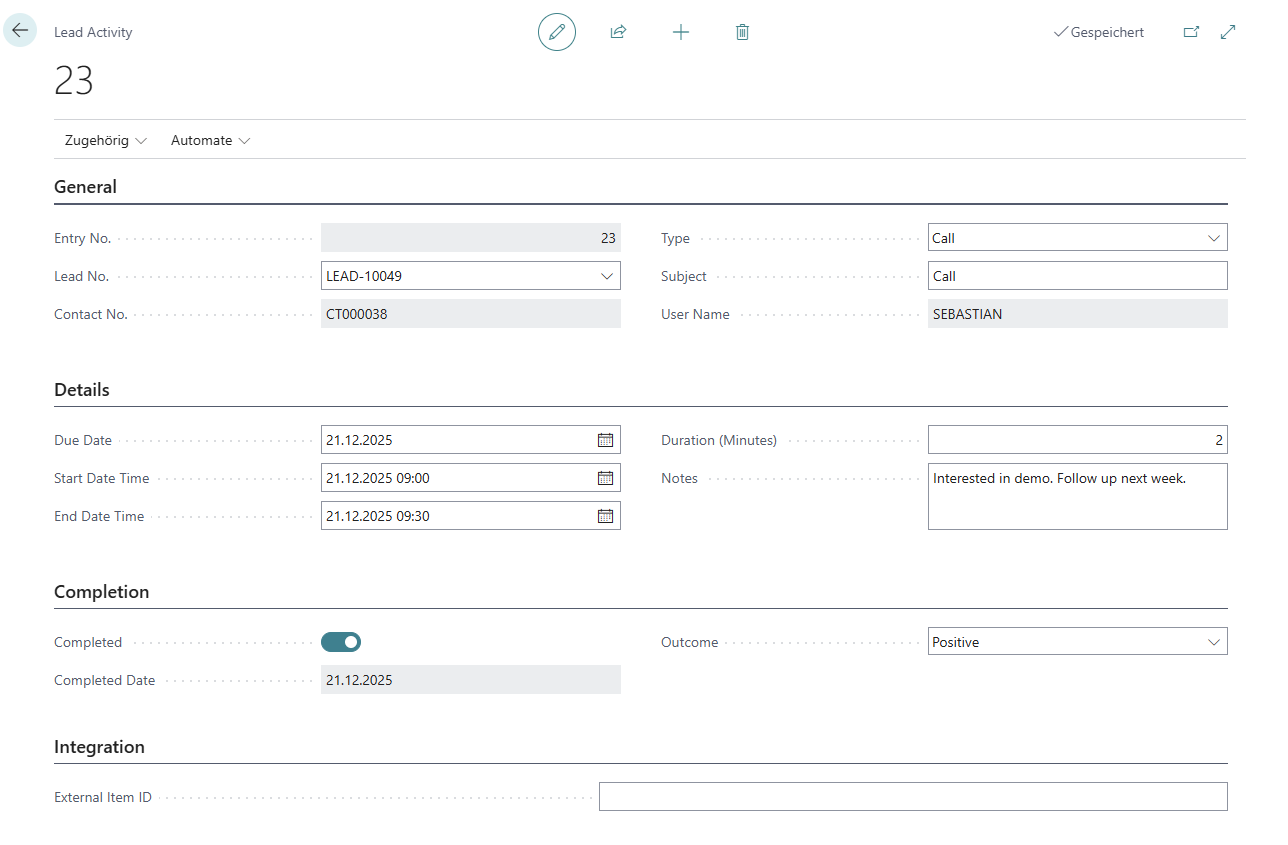
Adding Communication Notes
Track all interactions in one place:
- Open lead card
- Navigate to Communication tab
- Add notes in the text field:
- “Called 12/21. Interested in demo. Follow up next week.”
- “Emailed pricing. Awaiting response.”
- Save the lead
Best practices:
- Date stamp each note
- Include next action
- Note who you spoke with
- Track email/call outcomes
Engagement Signals
Track how engaged the prospect is:
- Open lead card
- Navigate to Engagement Signals section
- Toggle switches for:
- Website Visit: Yes (if they visited your site)
- Email Opened: Yes (if they opened emails)
- Attended Event: Yes (if they came to webinar/trade show)
Why it matters:
- Increases lead score automatically
- Identifies hot leads
- Prioritizes your follow-up list
Lead Scoring
Understanding Scores
Score Bands:
- 🔥 Hot (70+): Immediate priority, high conversion potential
- 🌡️ Warm (40-69): Active follow-up, qualified interest
- ❄️ Cold (<40): Nurture campaign, low priority
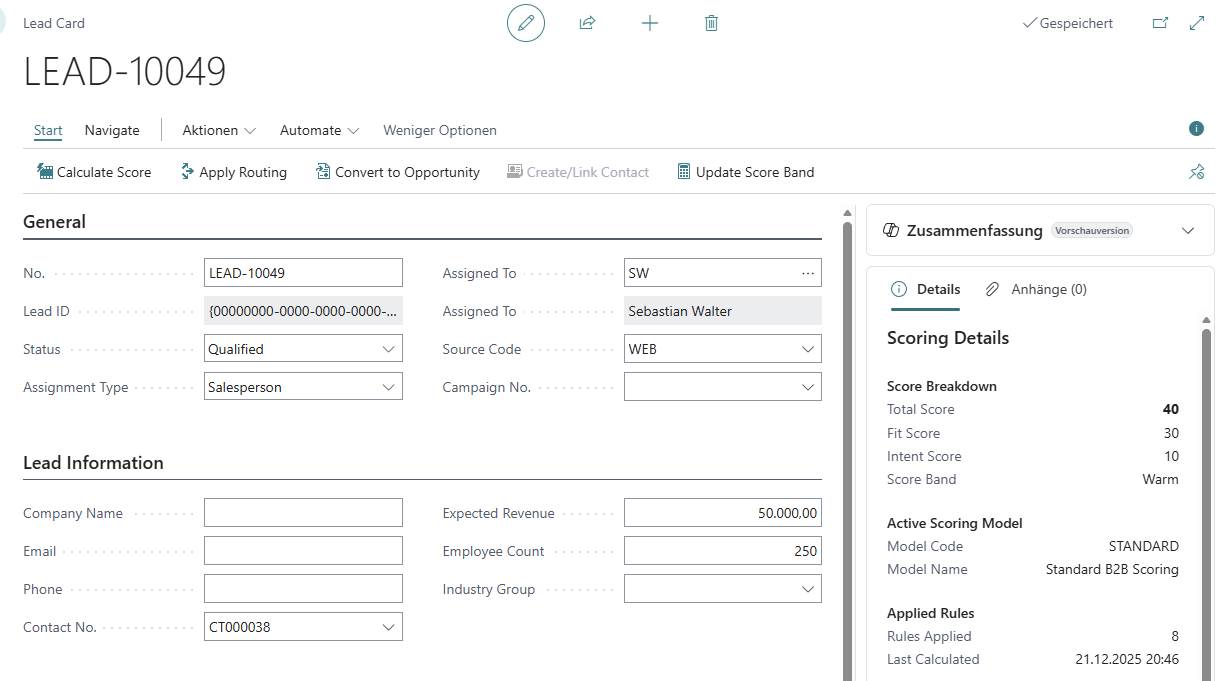
Calculating Scores
Automatic Calculation:
- Open any lead
- Click Actions → Calculate Score
- Score appears in Score (Total) field
- Check Scoring Details FactBox to see breakdown
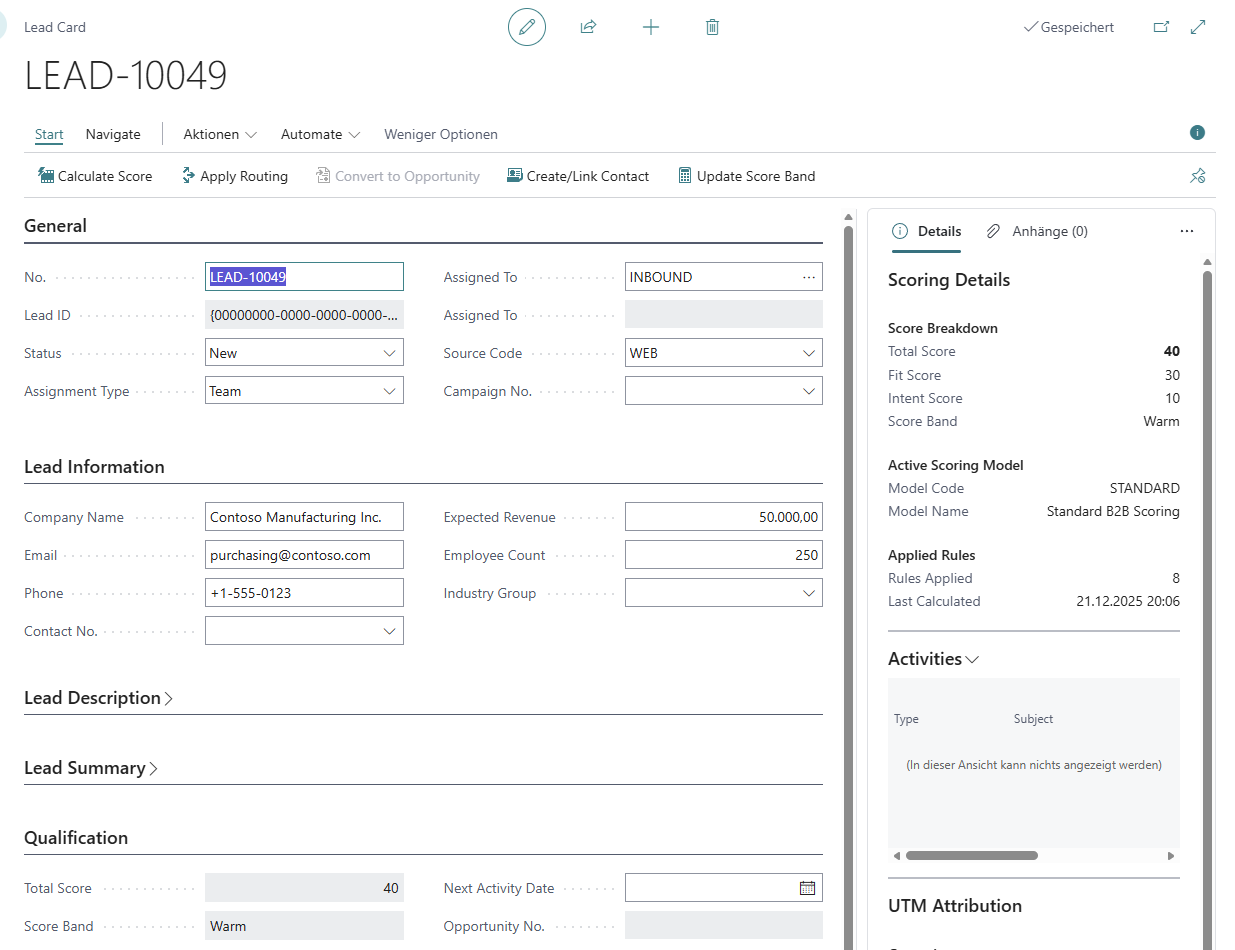
What gets scored:
- Source: Web leads +10, Referrals +25, Email +15
- Company Size: Large companies (>100 employees) +20
- Engagement: Website visit +8, Email open +5
- Other: Custom rules defined by admin
Recalculating:
- Scores update when lead data changes
- Use Actions → Calculate Score to refresh
- Bulk action available: Select multiple leads → Recalculate Scores
Manual Override
When to use: Strategic accounts, CEO referrals, urgent follow-ups
Steps:
- Open lead
- Manually change Score (Total) field to desired value (e.g., 100)
- Score band updates automatically
- To revert: Click Actions → Calculate Score
Important: Manual scores are overwritten when “Calculate Score” is used again.
Lead Assignment
Viewing Your Leads
Personal Filter:
- Open SEW Leads list
- Click Filter Pane (right side)
- Filter Assignment Type = “Salesperson”
- Filter Salesperson Code = your code
- Result: Shows only leads assigned directly to you
Team Filter:
- Filter Assignment Type = “Team”
- Filter Assigned To Code = your team code
- Result: Shows all leads assigned to any team you’re in
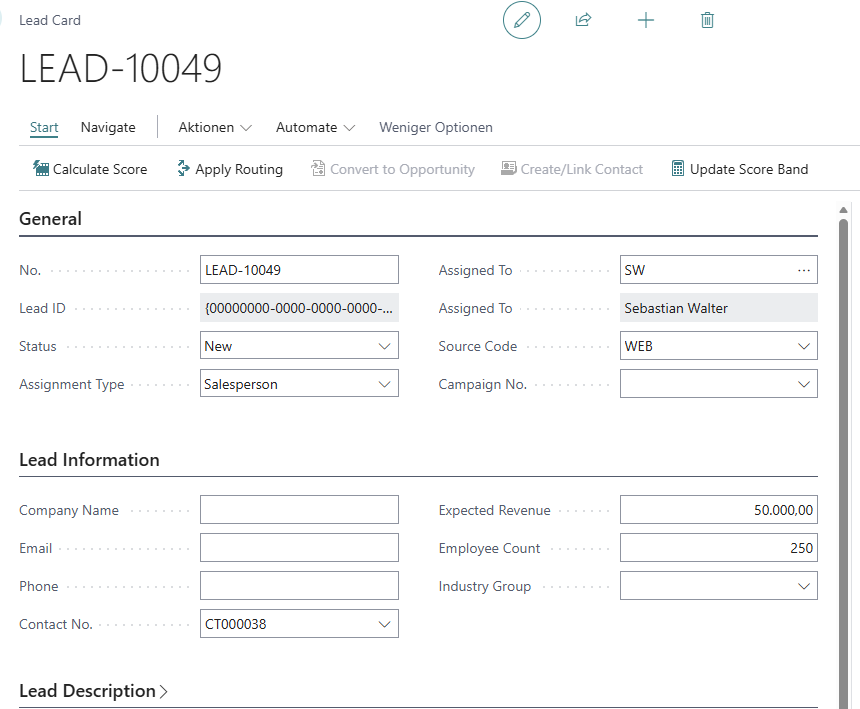
Automatic Routing
How it works:
- Admin creates routing rules (e.g., Score ≥ 75 → ENTERPRISE Team)
- You create or update a lead
- Click Actions → Apply Routing
- System assigns lead based on matching rules

What gets routed:
- High-score leads → Enterprise team
- Web leads → Inbound response team
- Territory-based → Regional salesperson
- Default → Round robin rotation
Manual Reassignment
When to use: Workload balancing, expertise requirements, geographic changes
Steps:
- Open lead
- Click Actions → Reassign Lead
- Dialog appears:
- Change Assignment Type: Salesperson or Team
- Select Assigned To: Pick from lookup
- Add Reason: “Lead requires enterprise expertise”
- Click OK
Audit Trail:
- Every reassignment is logged
- View Related → Assignment History
- Shows From/To, Reason, Timestamp, Changed By
Team Collaboration
Working Team-Assigned Leads
Scenario: Your team (INBOUND) has 20 leads. How do you collaborate?
Viewing Team Leads:
- Open SEW Leads
- Filter Assignment Type = “Team”
- Filter Assigned To Code = INBOUND
- Result: All team members see the same leads
Best Practices:
- Add communication notes so teammates see progress
- Avoid duplicating contact efforts (check notes first)
- Update Status regularly (New → Contacted → Qualified)
- Convert to Opportunity when ready (picks owner)
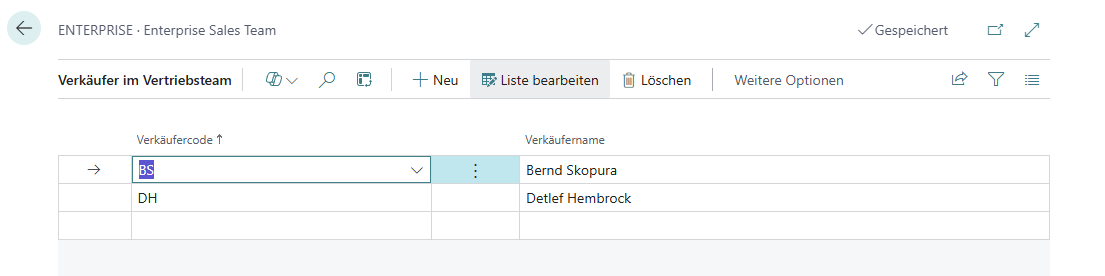
Team Structure
Understanding Teams:
- Teams are standard BC objects (search “Teams”)
- Teams have multiple salesperson members
- Leads assigned to team = shared ownership
- Opportunities require individual owner (team member picks ownership)
Example Teams:
- INBOUND: Fast response to web/email leads
- ENTERPRISE: High-value leads requiring consultative selling
- VERTICAL-MFG: Manufacturing industry specialists
Converting to Opportunities
Prerequisites
Before converting, ensure:
- ✅ Lead Status = “Qualified”
- ✅ Contact No. is populated (use Create/Link Contact if blank)
- ✅ Lead has been worked (not just created)
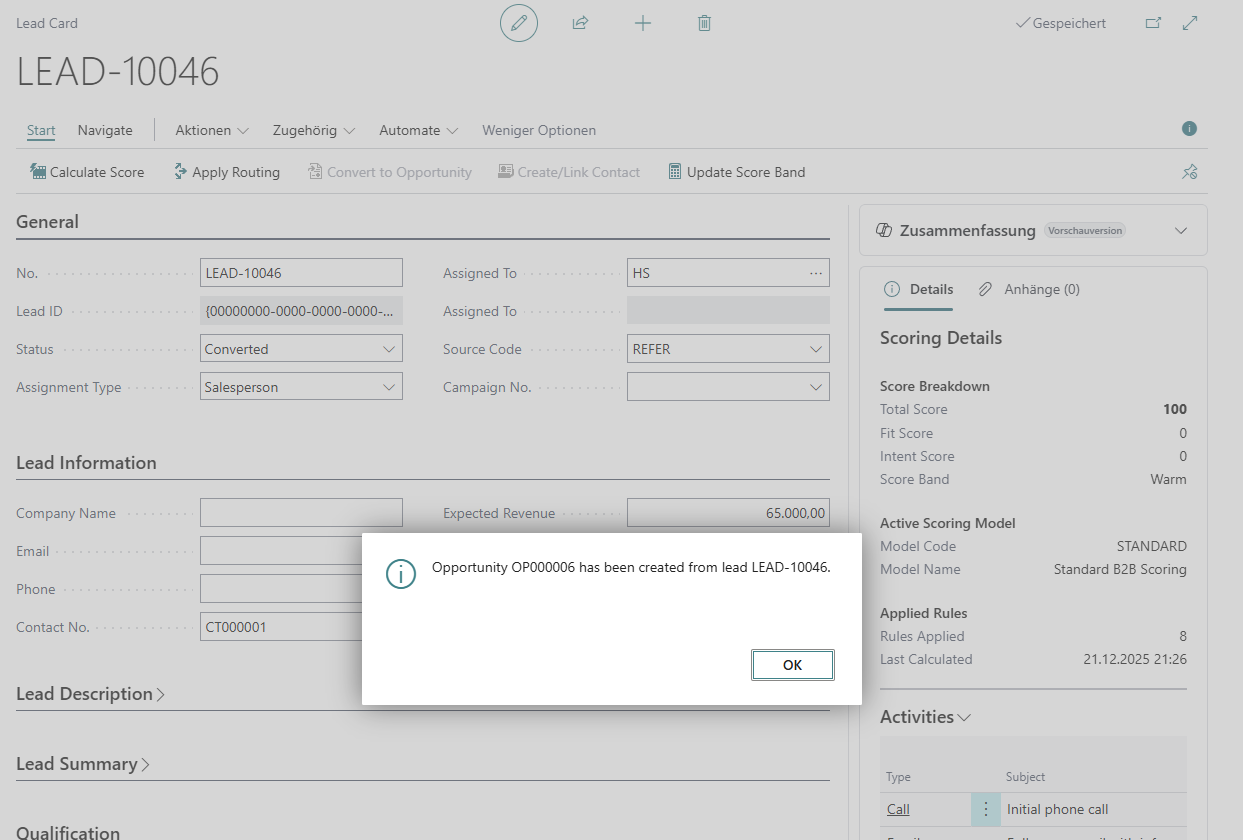
Individual Lead Conversion
When: Lead assigned to you (not a team)
Steps:
- Open qualified lead
- Click Actions → Convert to Opportunity
- Dialog shows:
- Salesperson: Auto-filled with your code
- Opportunity Description: Auto-filled from lead name
- Create Contact: Already done (shows existing Contact No.)
- Click OK
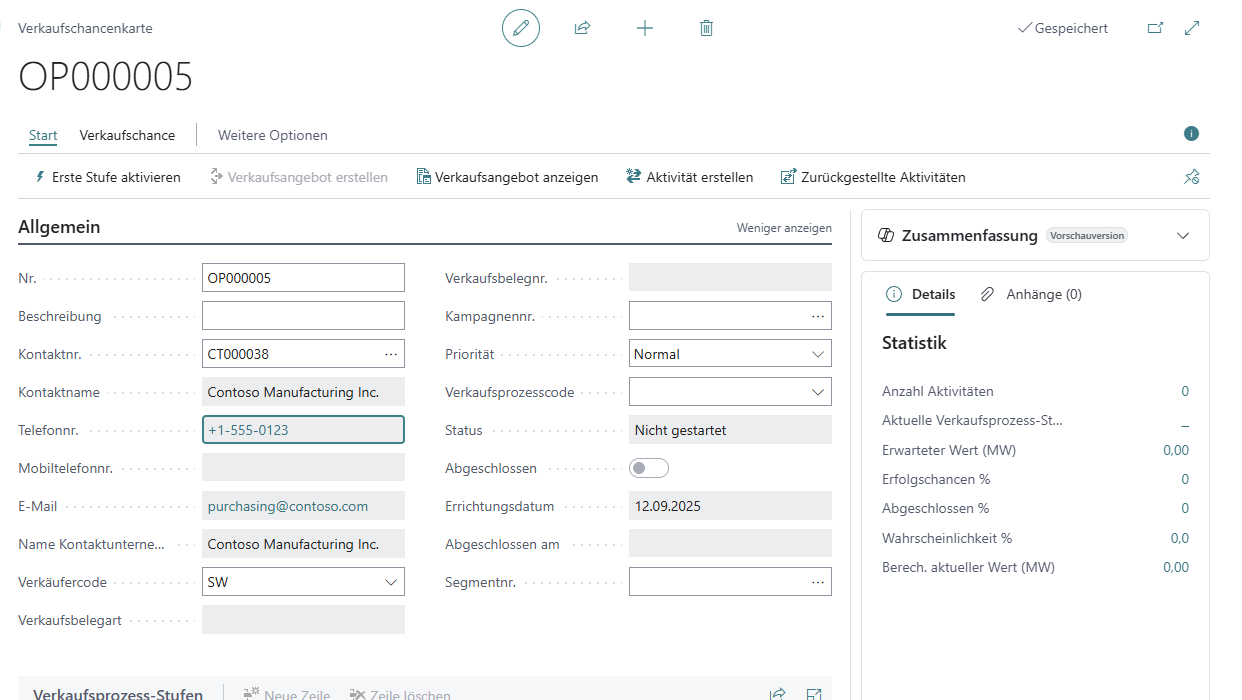
Result:
- New BC Opportunity created
- Lead Status → “Converted”
- Lead linked to Opportunity (Related → Opportunity)
- Work continues in standard BC Opportunity Card
Team Lead Conversion
When: Lead assigned to a team (e.g., ENTERPRISE)
Steps:
- Open qualified team lead
- Click Actions → Convert to Opportunity
- Dialog shows Salesperson Selection:
- If you’re in the team: Auto-selects you
- If not in team: Shows all team members
- Pick the team member who will own the opportunity
- Click OK
Why it matters:
- BC Opportunities require individual owner (not teams)
- This is the handoff from collaboration → individual accountability
- Selected salesperson owns opportunity in sales pipeline
Kanban Pipeline View
Accessing Kanban Board
- Search for SEW Lead Kanban in Business Central
- Board shows leads grouped by stages
- Color-coded by score band (Red=Hot, Orange=Warm, Gray=Cold)
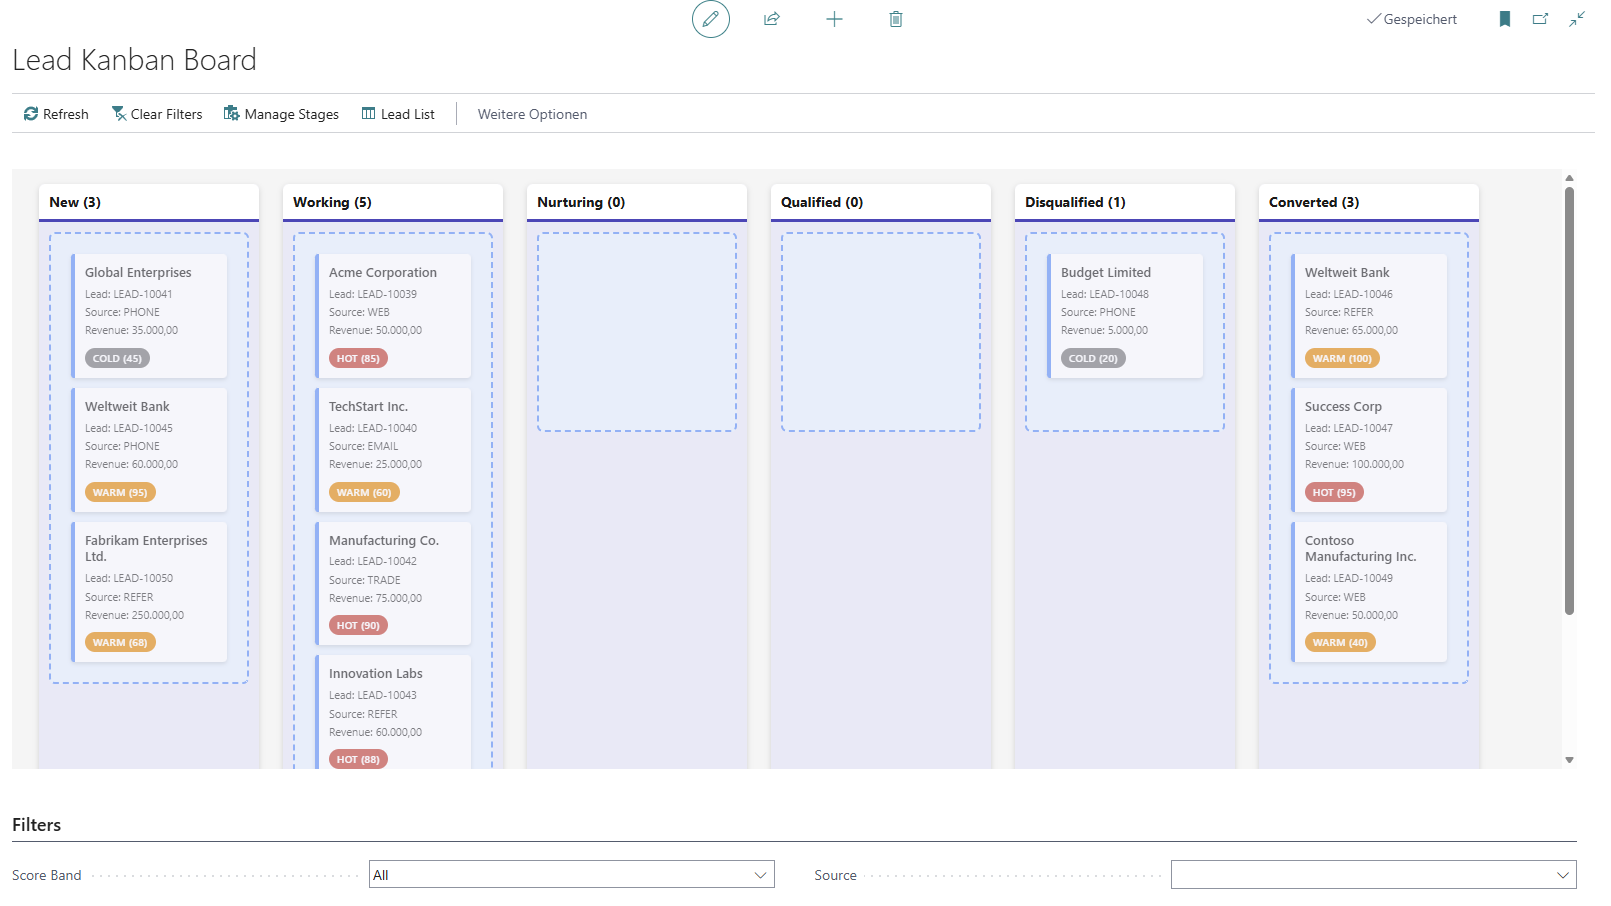
Using the Board
Drag-and-Drop:
- Click and hold a lead card
- Drag to different stage column
- Release to drop
- System updates:
- Stage Code field
- Probability % (from stage default)
Filtering:
- Owner: See only your leads or team leads
- Score Band: Show only Hot leads
- Source Code: Filter by lead source
Actions:
- Refresh: Reload board data
- Clear Filters: Show all leads
- Manage Stages: Configure pipeline stages
- Lead List: Return to list view
Tips:
- Use for weekly pipeline review meetings
- Identify bottlenecks (stages with too many leads)
- Prioritize hot leads in early stages
- Move stale leads to Disqualified
Analytics & Reporting
Personal Performance
View Your Metrics:
- Search for SEW User Performance query
- Filter to your Salesperson Code
- See:
- Total leads assigned
- Pipeline value (sum of Expected Revenue)
- Average score of your leads
- Activity count (tasks, meetings)
- Conversion metrics (converted leads, opportunity value)
Team Performance
Compare Sources:
- Search for SEW Source Performance query
- See which sources generate best leads:
- Lead count by source
- Conversion rate
- Average score
- Opportunity value
Use cases:
- Focus on high-performing sources
- Deprioritize low-quality sources
- Justify marketing spend
Pipeline Analysis
Funnel View:
- Search for SEW Lead Funnel Analysis query
- See stage-by-stage metrics:
- Lead count per stage
- Average days in stage
- Pipeline value per stage
Identify Issues:
- Bottleneck stages (high day count)
- Drop-off stages (low conversion)
- Stale leads (>30 days in stage)
Dashboard
Real-Time Overview:
- Search for SEW Lead Analytics
- View metrics:
- Total Active Leads
- Pipeline Value
- Hot Leads Count
- Conversion Rate %
- Open/Overdue Activities
- Click any metric to drill down to lead list
Role Center Integration:
- Add SEW Lead Analytics RC to your Role Center
- Cue tiles for quick access
- RefreshOnActivate = real-time data
Tips & Best Practices
Daily Workflow
Morning Routine:
- Open SEW Leads filtered to your assignments
- Sort by Score (descending) - hot leads first
- Check Overdue Activities in analytics
- Work through top 5 hottest leads
Throughout Day:
- Update Status as you contact leads
- Add communication notes after each interaction
- Toggle engagement signals when prospects respond
- Convert qualified leads immediately
End of Day:
- Schedule follow-ups as BC Activities
- Update Expected Revenue for progressing leads
- Reassign leads if needed (vacation, expertise)
Lead Qualification
BANT Framework:
- Budget: Do they have budget? (ask, note in comments)
- Authority: Are they decision-maker? (if not, who is?)
- Need: Do they have a clear problem we solve?
- Timeline: When are they looking to buy?
When to Qualify:
- All BANT criteria met
- Engaged in conversation (not just form fill)
- Expressed interest in demo/proposal
- Contact created and verified
When to Disqualify:
- No budget or authority
- Outside your target market
- No response after 3+ attempts
- Competitor/not a fit
Score Optimization
Boost Scores:
- Add Employee Count (large companies score higher)
- Toggle engagement signals (website visit, email open)
- Update Expected Revenue (higher value = higher priority)
- Change Source (referrals score highest)
When to Override:
- Strategic account (CEO referral)
- Event-driven urgency (trade show VIP)
- Executive directive
- Timing-sensitive opportunity
Team Collaboration
Communication:
- Always add notes after contacting team leads
- Check notes before contacting (avoid duplicate calls)
- Update Status so team knows progress
- Convert promptly when qualified (frees team capacity)
Workload:
- Use round robin for fair distribution
- Monitor team lead counts (balance workload)
- Reassign if someone overwhelmed
- Pick up unworked team leads proactively
Pipeline Management
Weekly Review:
- Open Kanban board
- Identify leads stuck in stage >14 days
- Take action:
- Move forward if progressing
- Move to Nurturing if not ready
- Disqualify if no response
- Focus on Hot leads in early stages (quick wins)
Monthly Cleanup:
- Review all “New” status leads >30 days old
- Contact or disqualify (prevent pipeline rot)
- Archive converted leads (Status already “Converted”)
- Celebrate wins (converted leads → closed opportunities)
Troubleshooting
Can’t Convert to Opportunity
Problem: “Convert to Opportunity” action grayed out or errors
Solutions:
- Check Status = “Qualified” (not New, Contacted, or other)
- Ensure Contact No. is populated
- If blank: Click Actions → Create/Link Contact
- Verify you have permission to create Opportunities
- Check lead isn’t already converted (Status = “Converted”)
Score Not Calculating
Problem: Score shows 0 or doesn’t update
Solutions:
- Admin: Ensure at least one Scoring Model is Active
- Admin: Check Scoring Rules have point values >0
- Fill in scorable fields:
- Source Code (required)
- Employee Count (if using company size rules)
- Engagement signals (if using engagement rules)
- Click Actions → Calculate Score
Routing Not Assigning
Problem: “Apply Routing” does nothing
Solutions:
- Admin: Check at least one Routing Rule exists with Active = true
- Verify lead matches rule conditions:
- Score meets threshold (if score-based rule)
- Source Code matches (if source-based rule)
- Territory matches (if territory-based rule)
- Check Team/Salesperson Code in rule is valid and active
- Verify you have permissions to modify assignment fields
Can’t See Team Leads
Problem: Teammate says team lead exists, but you don’t see it
Solutions:
- Verify you’re a member of the team (search “Teams”, check members)
- Apply correct filter:
- Assignment Type = “Team”
- Assigned To Code = [your team code]
- Check Status filter (Converted leads hidden by default)
- Refresh list (F5)
Getting Help
📞 Support Resources
- Admin Questions: Contact your system administrator for setup issues
- Training: Request additional training session if needed
- Technical Issues: GitHub Issues
- Documentation: Technical Documentation